Kate Blackport

Design • Sewing • Repair

July 2, 2020
by admin
0 comments

Face Masks – Sewing For Covid-19

Updated: See below for the third mask pattern I’ve tried (my favorite!)

In April, I tried sewing some DIY face masks for my personal use and to give to friends and family. As I am averse to single-use items, a reusable mask to wear during Covid-19 social distancing was a must for me.

I started with a fairly simple pattern, from this USA Today Article.

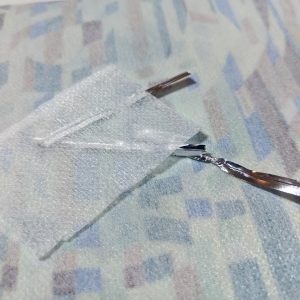
I also used some iron-on interfacing to add another layer of protection to the mask.

First Attempt:

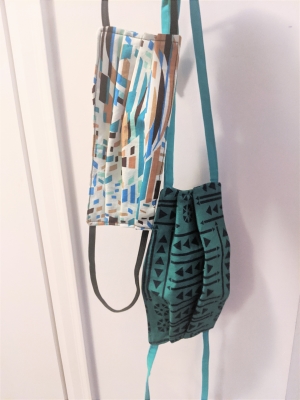
The first one I made with some Spoonflower fabric I’d ordered from my own pattern back when I was taking a sewing class and made a zippered pouch with it.  The fabric was the Kona Cotton Ultra.


View this post on Instagram


A post shared by @refusereuse on

It turned out pretty good and I do use this face mask, but I find the fabric combined with the interfacing makes it a little stuffy/hard to breathe.

Image shows two completed pleated masks in turquoise patterned cotton woven fabric. One has elastic earloops and the other one has fabric ties sewn into the mask that tie around the back of the head.

The rest of the masks I made with basic quilting cotton, but I had ironed on the interfacing before I realized I didn’t necessarily like it.
But the interfacing + lighter weight cotton turned out good.

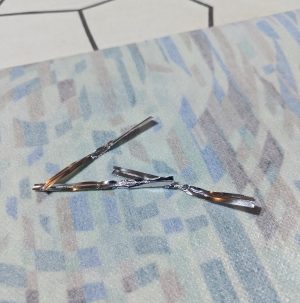
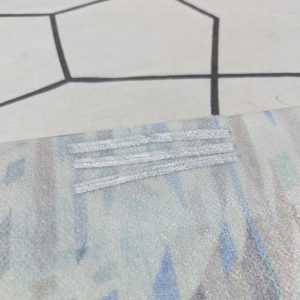
I did attempt to add a bit of a nose piece to a few of these masks by ironing in three pieces of twist ties using a piece of fusible interfacing on the inside before sewing, however after going through the wash a couple times, it appears the wires just kinda come off and get all bent up from the heat. So, it’s best to have a removable wire nose piece.


I made five masks like that and sent some to family members and gave one to a friend.

Trying A Different Pattern:

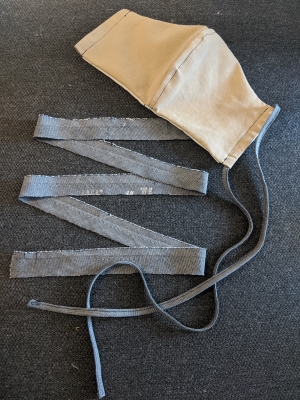
As things have progressed and more stores were making masks mandatory and it was becoming more regular for people to be wearing them, I figured I needed to make one for Lee. I have a box of worn out clothes that I’ve saved for the purpose of upcycling, mostly Lee’s ripped jeans which would be too thick/hot for a face mask, but I did find a pair of his ripped khaki shorts that worked nicely for a mask.
I ripped out the pockets and used those as the lining fabric for the mask with the khaki as the outside. I was also able to rip out the blue waistband lining to sew into a bias tie for the mask.

This time I used a different pattern. I went with one I found via some local maker community folks. They have a great page here which explains the proper way to use face masks, disinfect them and includes a tutorial and pattern to make DIY face masks.
I recommend reading their page, even you don’t plan on making your own mask, as it has a lot of good information on what can be reused/disinfected and what can’t.

This pattern allows for an filter insert of your choice and a wire nose piece.

Here’s the khaki one in progress:

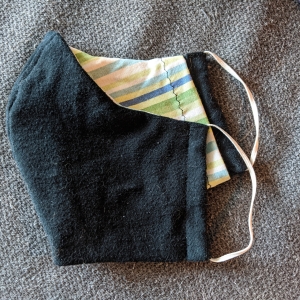
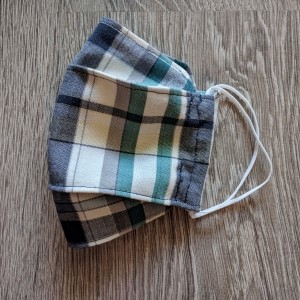
Lee wasn’t too keen on the colour, so I ended up making him another one in black out of a black tshirt a friend gave me and a leftover piece of some old PJ pants of mine that had worn out. Both are a stretch knit fabric, so not as ideal as the woven cotton, but still better than nothing. I used the same pattern so a filter can be inserted. I am not really too familiar with sewing knits, so it was a bit frustrating.

I used elastics this time, with the knots tucked into the tie tubes in the mask.

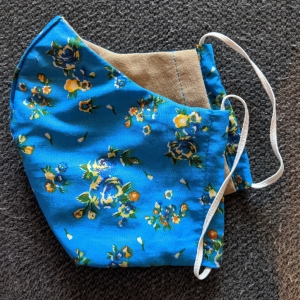
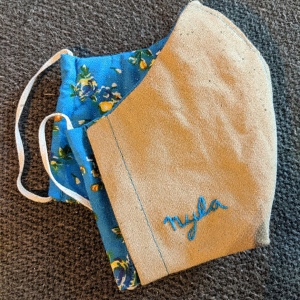
I also made one more for a friend’s 6yo daughter who was having issues wearing a regular medical mask not made to fit a child.
This pattern has different sizes so I made her a small sized face mask and choose my prettiest fabric and added in a bit of embroidery of her name inside.

I’ll definitely be making more of this style while I’ve got the fabric to use and elastic/ties.
The elastic and ties can easily be switched out if the wearer prefers one to the other, and a pocket for the wire nose piece can be added at the top.
The next one I’m going to make will be a pretty one in this style for myself. Might also add some more embroidery for fun.
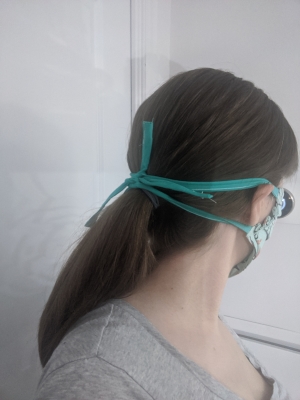
Another note I’d add is that I prefer myself wearing a mask that ties around my head to one that is elastics around my ears.
Before my grocery trips I put my hair in a pony tail and then tie both ties of my mask above my ponytail so that it doesn’t slip down.


Update: I tried a third mask pattern.

Lee and I went to the AGO for my birthday, then to a couple patios for eats and we ended up 10-pin bowling.
While at the AGO, Lee had a hard time with his black mask – it was too hot and hard for him to breathe in. We ended up ripping out the lining so he could stand it for the rest of the day. Then while we were bowling, I was wearing my mask that ties on the back of my head, and I had to keep pulling it down and putting it back up (had to wear the mask while up and about and on the lanes, and then could take it off at our table to have a drink) and realized that I really need a mask with elastic ear loops to make it easy to put on and take off. Especially since now our building has made masks mandatory in the elevators and lobby, so just to check the mail or get something from my car, I need to wear a mask.

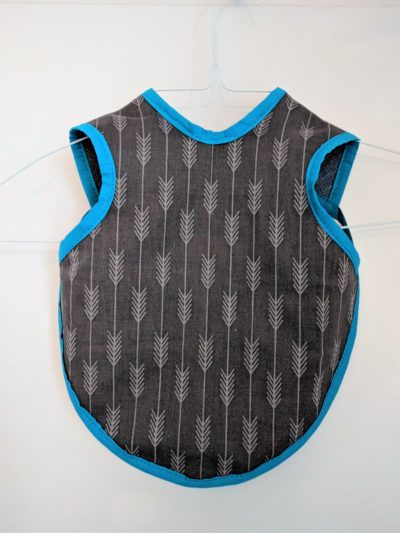
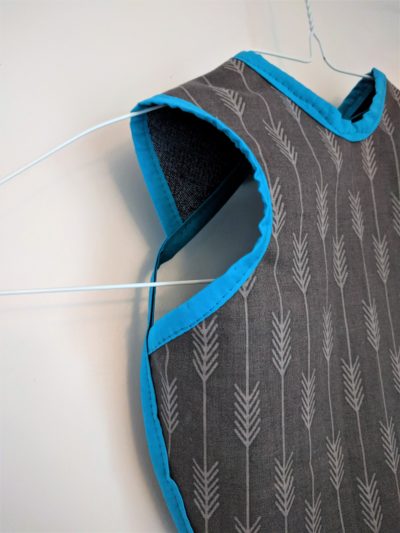
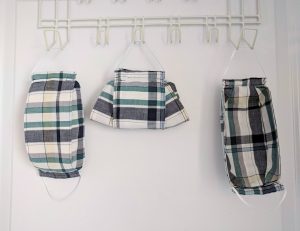
So, I found this pattern from See Kate Sew for a 3D mask pattern that was quite simple looking.

I ended up making three masks from this pattern, two for myself and one for Lee.
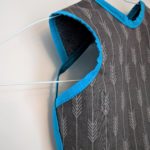
For my masks, I used the Adult Small size and for Lee’s I traced the Adult Medium size and added a half inch around all sides to make it a bit bigger. I didn’t bother with the filter pockets on any of them, and I haven’t yet sewn on a nose-wire pocket, though I may still do that.

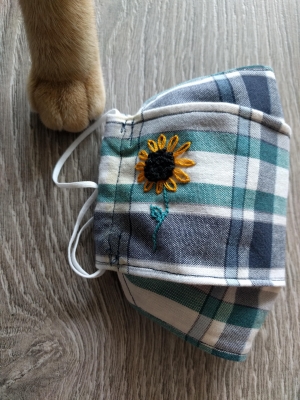
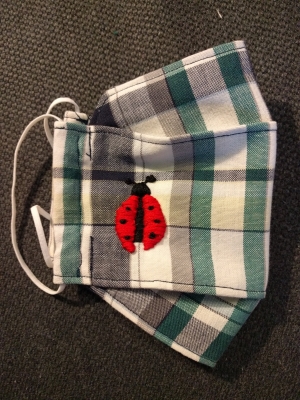
Then I made two more out of the same shirt, the right one is Lee’s.

And because we now have matching masks I thought it important to personalize them so I added some embroidery.

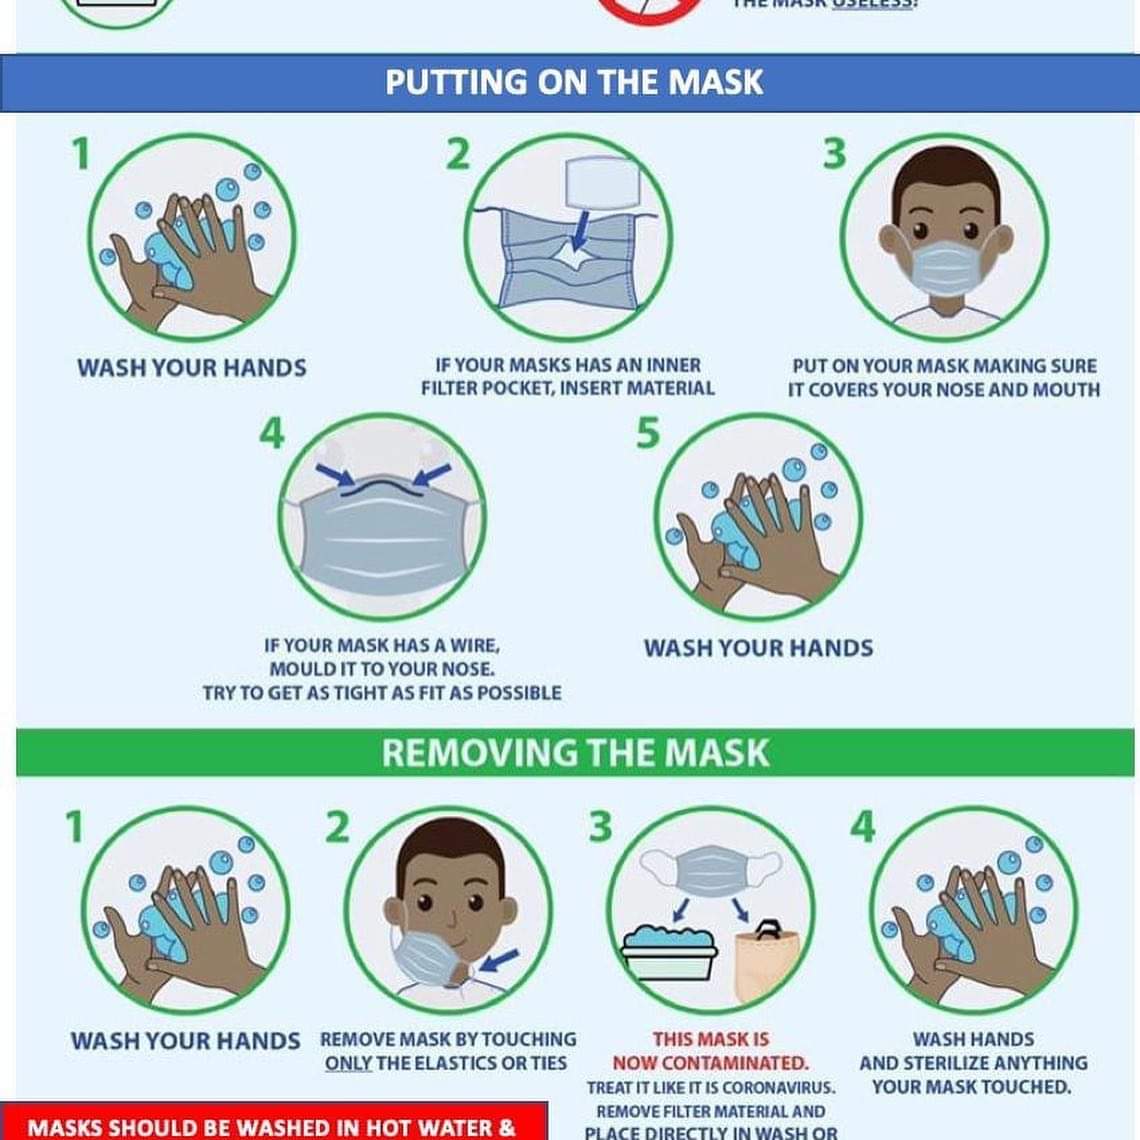
Here’s a great graphic on how to safely put on and remove masks whether you are wearing DIY face masks or disposable ones. I unfortunately don’t know the source of this graphic.

Close up detail of the bapron arm hole. The baron is sewn with a grey arrow pattern fabric with a blue bias.

July 21, 2019
by admin
0 comments

Sewing – Bapron!

Today I’m sharing a sewing project I did in April this year. I sewed a couple “Baprons” (bibs/aprons) for my niece (2) and nephew (6 months), and sewed one of each size.
The pattern is from Craftiness is Not Optional. I like design of the pattern, their arms go through the holes which keeps the bib down, so they can’t push it to the side or pull it up and it seems safer than it being just tied around their neck.
It was a fun project and I learned how to make and sew bias tape which I cut and ironed manually.

The front fabric for both bibs is from Michael’s and the fabric I used for the bias I got as small cuts from a closing Fabricland.
I realized I wanted a thicker kind of fabric for the back of the bibs, as you don’t want them to spill something and it just soaks right through the bib, so at first I was going to use flannel and I bought a men’s flannel shirt from VV and made the mistake of trying it on and loved it so much I couldn’t cut it up. So, then I used Lee’s old ripped jeans instead! I had to cut out the back part in two pieces and added seam allowance to sew them together as the pant legs of the jeans weren’t big enough to cut one whole piece out of. I think they turned out pretty well. My sewing on the bias tape isn’t perfect, but not bad for my first time. This project was also a good exercise in properly pinning to make it easier to sew.

Here’s the smaller one for Finn:
Front view of the smaller grey and blue bapron. The main fabric is a grey arrow (or wheat) pattern from Michael's and the bias tape is a bright blue.
Close up detail of the bapron arm hole. The baron is sewn with a grey arrow pattern fabric with a blue bias.

Backside of the Bapron, the backside is upcycled jean material. The shoulders of the bib fold over because of how the bias arm holes are sewn.

And the bigger one for Serena:

Sewing a bapron with upcycled jean material for the back and pastel orange with white polka dot fabric for the front with a matching orange for the bias tape. This photo shows a closer up detail of the shoulders and the arm holes made with bias.

A back view of the larger bapron I sewed using upcycled jean material, plus orange polka dot fabric and orange bias tape. The baron ties around the neck with a loose bias bow.

This is an image of the front of the larger orange bapron. Sewn in orange polka dot fabric from Michaels, with orange bias.

Here’s the two of them together so you can see the size difference:


Sewing the Bapron bib, here are the two bibs side by side for size comparison. The larger one is orange polka dot with orange bias and the smaller is grey arrow (or wheat sheaf) pattern with a blue bias.

February 3, 2018
by admin
0 comments

Wytchwood – A Crafting Game

Alientrap Games new crafting game is coming to PC, Mac (and other platforms) in 2018!
The team is made up of:

Jesse McGibney who did the art and game design for Capsized, Apotheon and Cryptark
Ariane Laurence who also worked on animation for Cryptark
Liam Sauve who is new to our team since 2017
Graeme Collins who also worked on Cryptark
Ryan Roth who did music for Cryptark


I’m very excited about this game, as I am obsessed with Don’t Starve (just played this morning), and recently played Stardew Valley. Crafting games like those are definitely more my type. I could not even complete one level of Cryptark when it was released, I’m just not an experienced gamer.


Wishlist the game on Steam!

January 19, 2018
by admin
0 comments

What’s Keeping Me Busy?

Happy 2018!

Just a few updates of what I’ve been doing.

If you read my last post, you know I’m working for Lee’s business, Alientrap Games.

And now that it is January I have a few new things going on.


Dream Zero


I helped make a website for a friend’s startup, Dream Zero, which rents reusable cups to events in Toronto.
The idea is to prevent the waste of disposable cups by providing reusables ones which attendees us on a deposit system. When the return the cup at the end of the event, they get their deposit back. Not only does this prevent cups from ending up in the landfill, but it helps clean up the event site.
Consider using Dream Zero for your next event!


Flex Day

I am going to be an exchange member, making coffee and greeting members at the new coworking startup Flex Day when they open their Liberty Village location at Locus 44. Flex Day takes advantage of unused spaces in restaurants that are closed during the day to provide affordable coworking space. It’s like a happy medium between an expensive co-working office and a coffee shop. Their Locus 44 location is opening in February and I will be there some days to open, set up power bars, make coffee and hang out in the space.
Come check it out and visit me if you get a chance!


ACCESS

Although I said I left my job last year, I am back at ACCESS for the month of January for three days a week, helping them transition while they do some hiring. Three positions are available if you are interested or know anyone! It’s nice to be back in the office and with my old coworkers!


Zero Waste


I’ve been meeting a lot of great people through Zero Waste meetups in Toronto, and our latest one was at Mary Be Kitchen this past weekend, where we learned to knit! Next one is going to be at Anarres Natural Health Apothecary in February. If you’d like to find out about our future events, join our Zero Waste Toronto Facebook group. Also, follow me on Instagram to see how my zero waste journey is going!


Classes

I’m also on the home stretch of my Bookkeeping course, taking my last two classes which started this week. Finished the Payroll Administration class in December, so if you’re looking for help with your payroll and remittances, hit me up!

August 31, 2017
by admin
0 comments

Alientrap Games!

If you don’t know me personally you may not know that my partner, Lee, is the founder of Alientrap Games. Alientrap is an indie game company based in Toronto.

I have been working for Alientrap part time for a few years and this year I left my non-profit job to work for him solely and go to school to be a bookkeeper!


The splash image for Cryptark, artwork by Jesse McGibney.

Artwork by Jesse McGibney.


Cryptark, Alientrap’s latest game, was released on Steam and PS4 in June.

We are currently working on two new projects that haven’t been announced yet. So stay tuned for exciting info!

Working for Alientrap is a lot of fun! We have been able to travel to different cities to show the games. Last summer we went to the UK for Develop:Brighton, Boston for PAX East, Los Angeles for Vision Summit and this year we went to SXSW in Austin, and BitBash in Chicago.


Zero Waste!

In other news, I have for the last year been trying to achieve a zero waste lifestyle. You can follow my zero waste journey on Instagram.


Glass bottles and jars filled with bulk goods, purchased at Bulk Barn.

A photo of a millennium falcon laser cut out of clear acrylic.

February 22, 2016
by admin
0 comments

Steamlabs

In January I joined a new makerspace in Toronto called Steamlabs. It is located in the new CSI building on Spadina Avenue.
I am participating in their membership exchange program where in exchange for a few volunteer shifts a month I get a free membership.
So far it has been fantastic. I have learned how to use the laser cutter, learned a little bit of arduino, have met lots of people and have accumulated endless ideas of things I can make. I have made use of a few screwdrivers taking apart my magic bullet in order to fix the base gear.
It is still in pieces as I have yet to buy super glue to fix the broken plastic part.


A photo of a dismantled magic bullet

My Magic Bullet in pieces while I was fixing it.


I have laser cut a few things already:


Photo of a wooden laser cut oval with a flower cut out of it

My first attempt at laser cutting at Steamlabs. Lots of technical issues.

A photo of a wooden laser cut heart valentine on a thread.

I decided to laser cut a valentine for Lee.

A photo of a millennium falcon laser cut out of clear acrylic.

I laser cut a millennium falcon out of clear acrylic.


And I am working on some new laser cut projects.
I am really excited to be making use of the space and the tools and joining this new community.

Photo of an arduino uno with a breadboard, jumper cables, switch and buzzer.

February 21, 2016
by admin
0 comments

Learning Arduino!

Yesterday I learned how to use a program an Arduino Uno to make lights blink, make a switch and a light sensor activate LEDs and a buzzer.
Oh the possibilities! I am definitely more of a fan of the programming side of things than the electronics part, but that’s fun too.

Photo of an arduino uno with a breadboard, jumper cables, switch and buzzer.

Kate Blackport - Praying Mantis Illustration

March 4, 2015
by admin
0 comments

Praying Mantis Illustration

I have been teaching myself to use Adobe Illustrator. Has been a long time coming and I think I’ve finally pushed past the frustration and I’ve learned enough about it to start having fun.
I have been designing some repeating patterns but tonight I did something different.


Kate Blackport - Praying Mantis Illustration

For the first time in a quite a few years I feel like I am regularily making new art, noticing myself improving and having a lot of fun at it.

Related Posts Plugin for WordPress, Blogger...